
green living and wellbeing
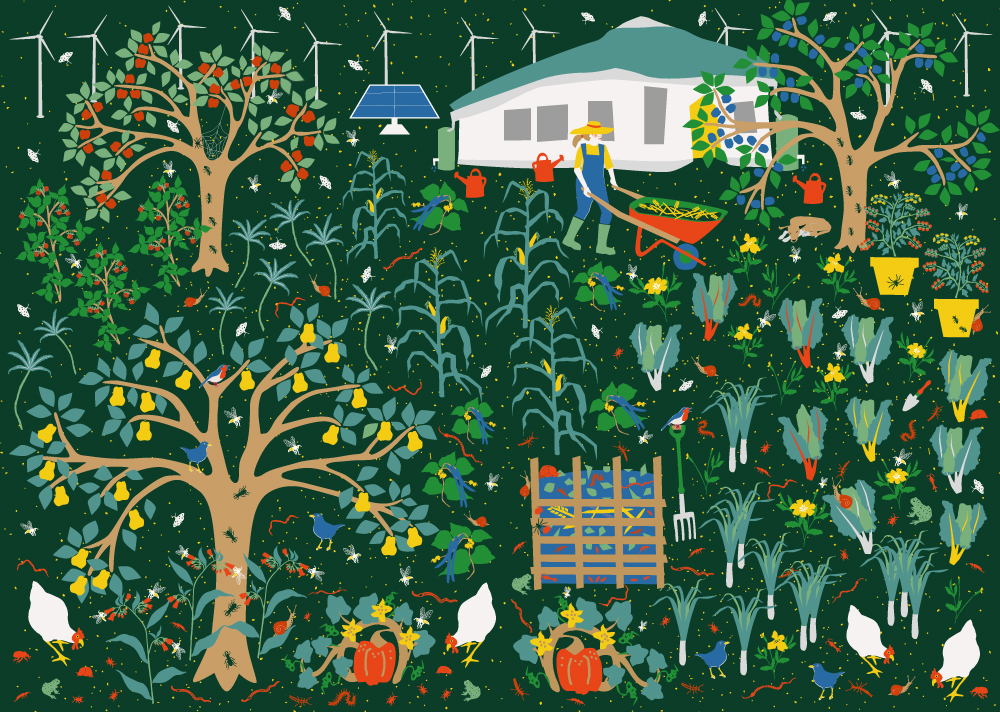
Why grow food?
There are a number of reasons to grow food. These are mine:
- It makes me feel good. While I am in the garden, all my attention is on what I am doing. It puts me fully in the present, which makes me happy. It is important to be happy.
- It keeps me in touch with the foundations of life – the soil and nature, the sun, the rain and the seasons.
- In a small way, I reduce my carbon footprint. Firstly, the plants and fruit trees in my garden convert carbon into oxygen. Secondly, by making compost with brown woody and leafy material, carbon is returned to the Earth. Thirdly, by putting food directly onto the table, I reduce my use of carbon emitting transport and farming methods, even if only a little.
- As the custodian of my tiny piece of ground, it is fulfilling to nourish the soil and enable microorganisms, plants and other life to thrive. This is part of the notion of being a good ancestor. I am looking after something for the future and creating a gift for my children and grandchildren, through a way of living. I want to be part of a good future narrative.
How I came to grow food
Before I share the way I garden, I want to tell you how I came to grow food.
After World War II, and having lived through the Great Depression, my parents wanted a stable life. Once married, they put their hearts into creating a ‘dream’ farm on which to raise a family. And that meant producing almost all our food.
As children, for a snack, we would pick a carrot out of the ground, or an orange or a mango off a tree. Seasonally, we gathered and feasted on wild field mushrooms, and ate guinea fowl stew. And we slathered fresh homemade bread with our own butter, and drank warm unpasteurised milk at breakfast.
For me, the most important thing I inherited was a love for soil and growing food. This, and crucially a strong connection to the Earth and the forces of nature. That was my parent’s great gift to me.
A circular approach to gardening
When I first moved to England, I had no idea how to grow food in this climate. So I had to start at the beginning. Over the years, I have developed a circular gardening system. Like a circular economy, there is no waste. Almost all of what comes out of my garden goes back in. Some goes to the local garden recycling skip for municipal composting; mainly roots and seedy weedy plants. I use this circular principle to do less work. You could call it being lazy. But it is based on ‘no dig’ gardening.
Start with compost
I learnt about compost from my mother. Compost feeds the microorganisms in the soil. Microorganisms are the silent work force that makes nutrients in the soil available to plants. The most familiar one is the humble earthworm. Nourish these creatures and they will do the work of aerating and building fertile, well-structured soil in your garden.

I have five compost systems all going at once. Sounds like work! It’s not.
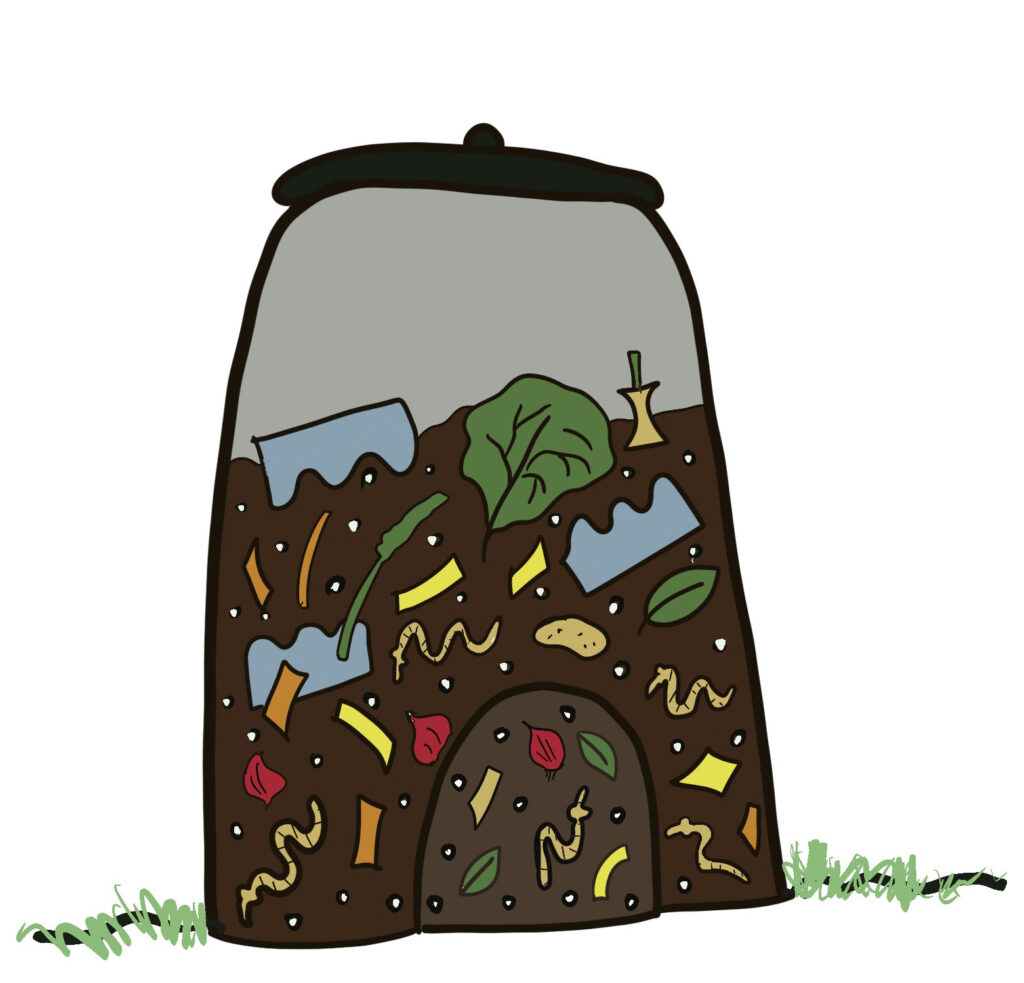
- A kitchen waste converter bin. You can purchase these in garden shops. This is where all our kitchen waste and egg boxes go. This bin is perfect for breeding earthworms. I use the worms when I feed the soil (see below). I regularly turn the contents to keep the bin aerobic. If it gets anaerobic, and slimy, it emits methane. Not good.
2. Chop and drop. When I cut back some plants or throw out cut flowers from the house, I use my secateurs to chop up and drop the material straight into the garden.
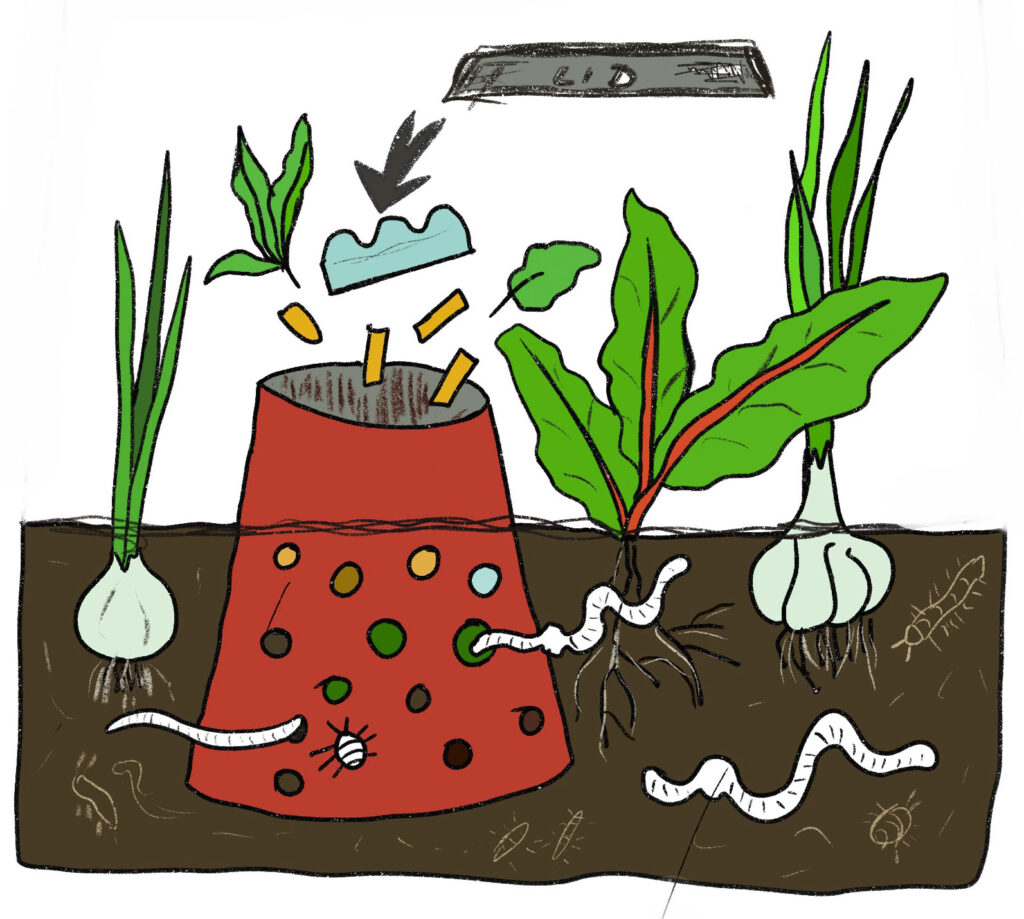
3. Mini kitchen waste converter bins. In the middle of each raised vegie bed, I have a mini kitchen waste converter bin. It’s a bucket in the soil with the bottom cut off, large holes drilled into the sides for earthworms to pass through and a lid (pot plant base) on top. I put a handful of worms from my main bin at the bottom and set the bin away as a breeding ground by feeding the bin with egg boxes and kitchen waste. The earthworms and other organisms then get to work and carry nutrients into the raised bed.
4. A comfrey water butt next to comfrey plants (loved by bumble bees). Standing on some bricks, the water butt has large stones at the bottom and some gravel stones around those. Filled with water, I add and cut comfrey and nettles, throughout the summer. The first batch might take a few months to work its magic. But once its going, you draw liquid manure into watering cans from the tap, dilute it, and use it to feed the soil.

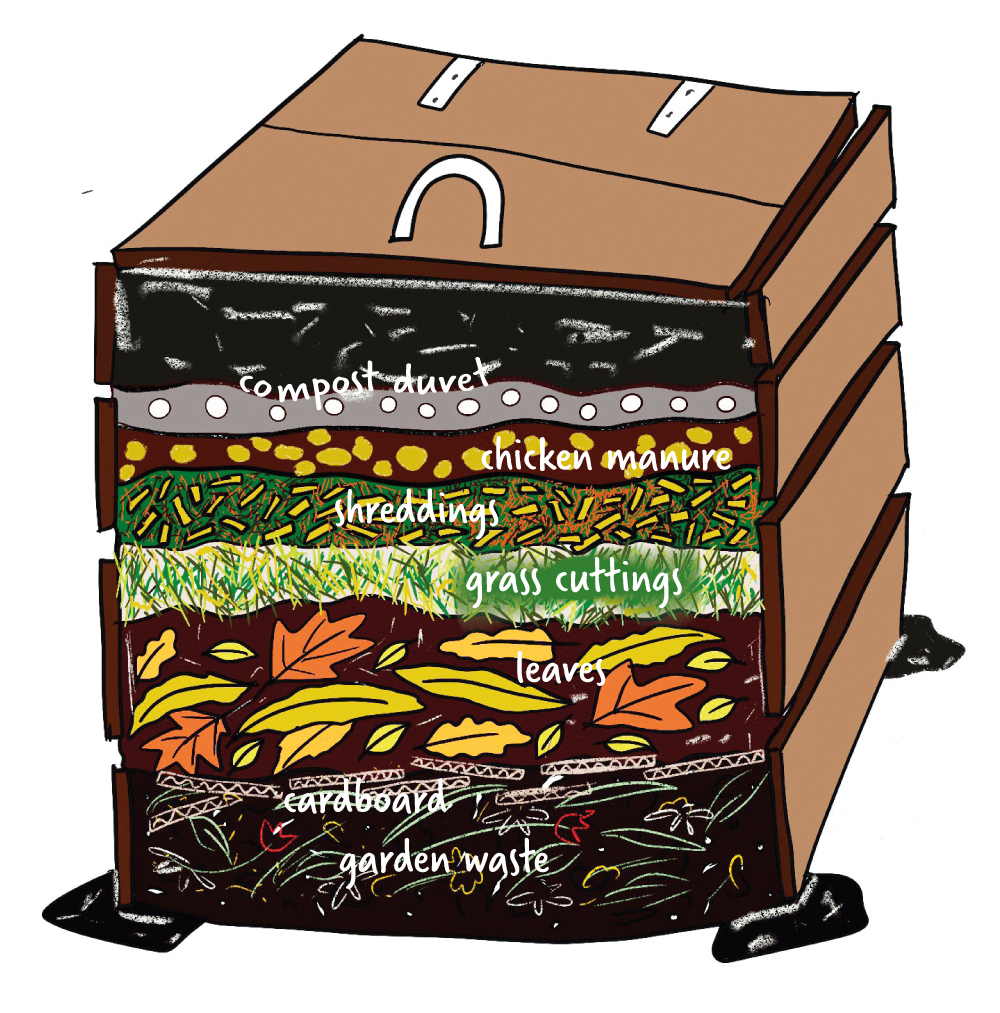
5. A wooden bin for garden waste and chicken manure (acquired from my neighbour’s chicken run). Here I put all the grass cuttings, leaves, shredded rose and fruit tree cuttings (I have a shredding machine), and torn up cardboard. I try to keep a balance between carbon rich brown matter and nitrogen rich green matter. I live near to some woodland, so now and again I grab a handful or two of soil from beneath the trees. This brings micorrhizal fungi into the mix, which is very good for developing soil structure and enabling nutrient uptake by plants.
The box is leaky so it lets in rain and it has a duvet I sewed out of some black garden plastic, filled with bubble wrap saved from parcel deliveries. This cover keeps the compost cosy in the winter. Once in a while I check it its warm and I turn the compost with a fork. This mixes up the elements and keeps the material aerated so that the process remains aerobic.
Feeding the soil in a weed controlling way
The weeds in my garden do get away sometimes, usually, when I am deeply involved in a design project! But I keep them at bay, for the most part, by feeding the soil.
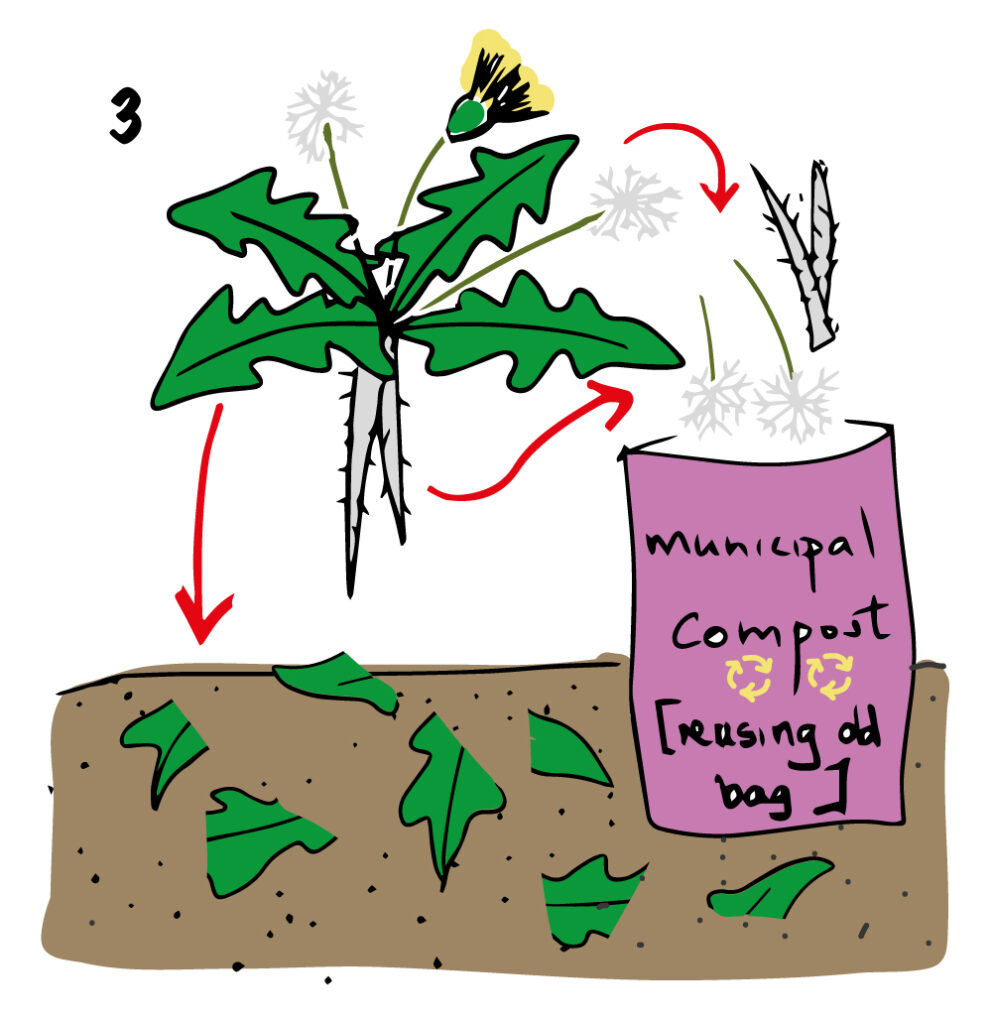
- Cut down to their roots any plants that are over. Leave the roots in the soil. This helps develop soil structure and provides nutrients to microorganisms. Chop up the old plants for composting. You can drop them if you like.
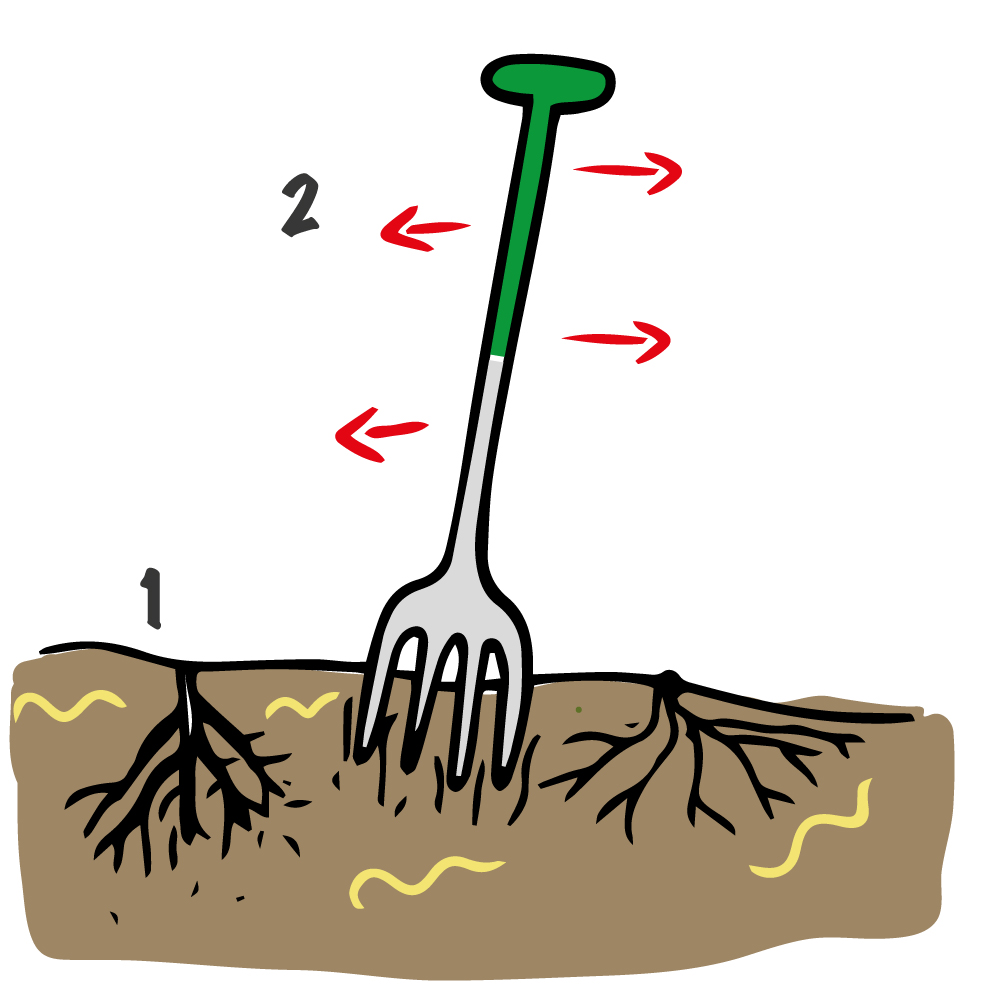
- When the ground is clear, begin with a fork. Don’t use a spade, which cuts up earthworms and disturbs the soil structural work being done by your microorganism workforce. Stick the fork into the soil and gently rock it back and forth once or twice to aerate. Don’t over do it. And don’t turn the soil. It’s unnecessary.
3. Pull out weeds. Remove their flower heads with seeds and their defiant weed root systems (dandelions come to mind). Weed roots and seed heads can go to the municipal compost skip. Then chop and drop the stems and leaves back onto the forked soil.
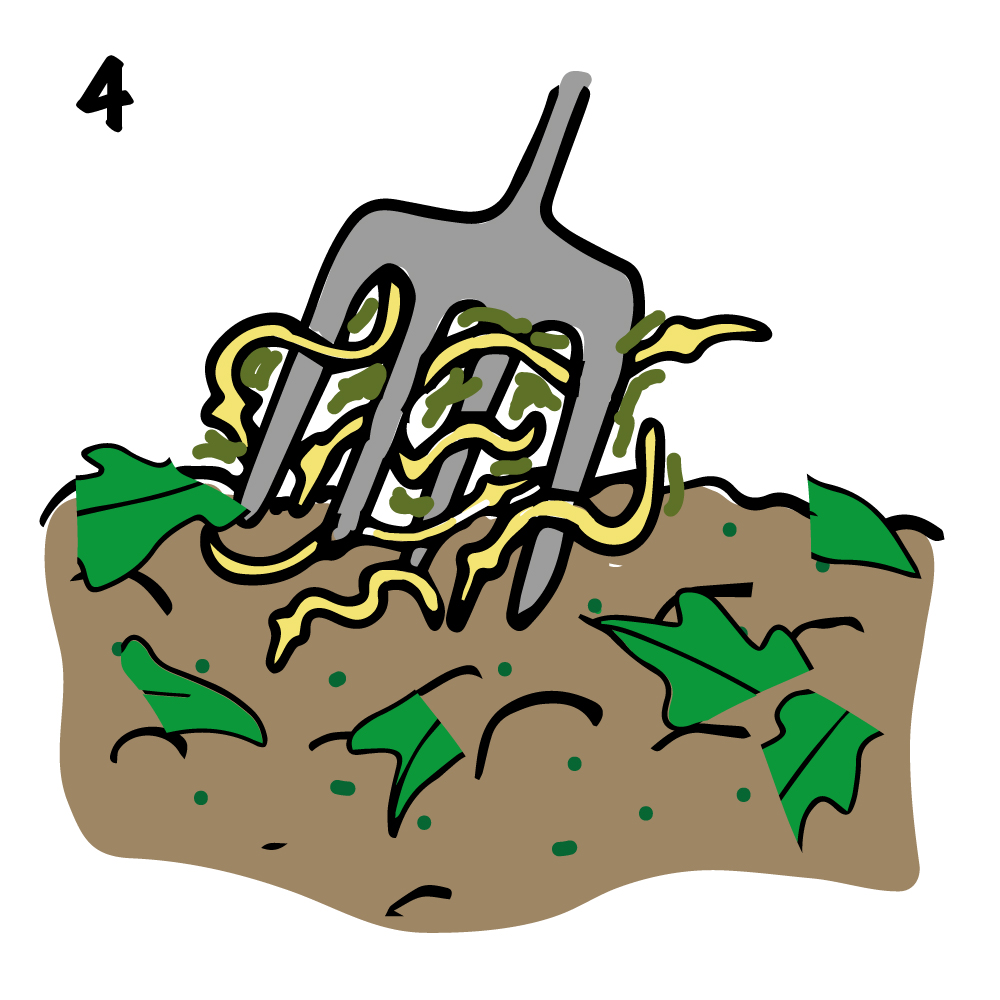
4. When you have worked an area with the fork, use your fork to carefully lift out some earthworms from the kitchen waste converter bin. This will bring mucky stuff with the worms, full of good bacteria and other soil crawlies. Spread all of this over the soil.
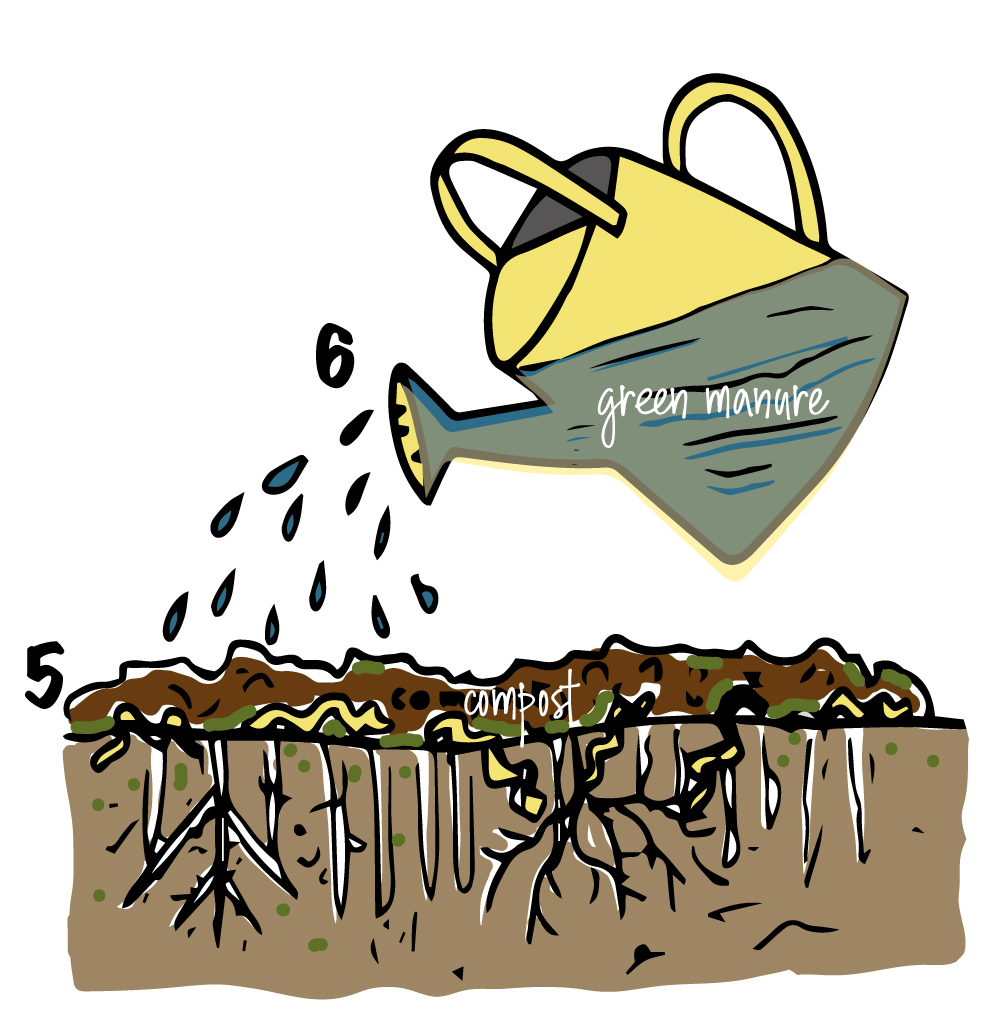
5. Then pour a generous layer of ordinary compost over the scattered worms. Don’t dig it in. Let your micro workers do the work. You can see these micro-organisms in my Living Soil notebook.
6. Half fill a watering can with green comfrey manure, if you have it. It will be a bit smelly, but the pong will soon disappear. Dilute the liquid with water, and sprinkle over the compost.
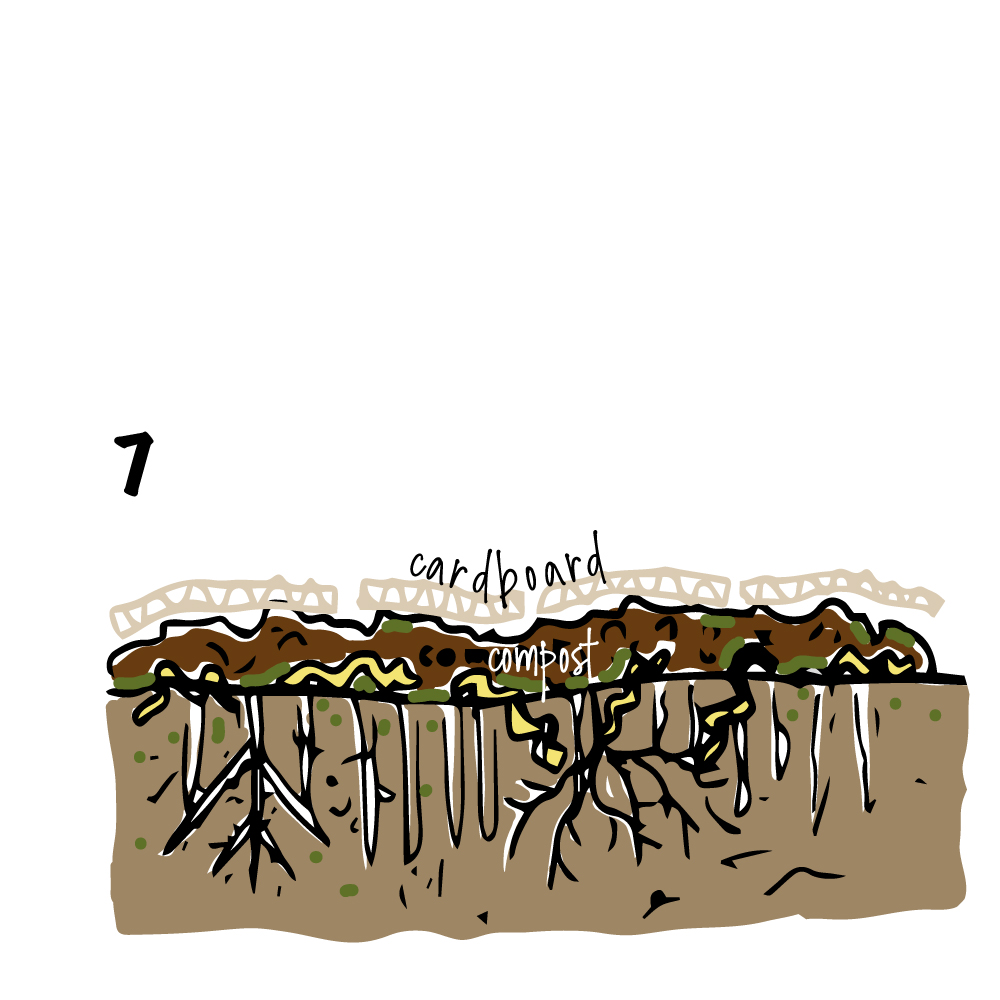
7. Now put on a layer of cardboard. If you tear it up into smallish pieces, like a jigsaw puzzle, over the compost, it is easier to plant later. The cardboard will help keep down the weeds and the micro-organisms will work it into the soil over time. In cold places, it will help to keep the soil warm.
8. Over all the layers, put on a good covering of straw. I buy this in, using a product called ‘Strulch’ (straw mulch). It’s a bit pricy, but a bag goes a long way. You can also use decorative bark or surplus shredded material from the garden. When done, you can water the area to settle all the layers down.
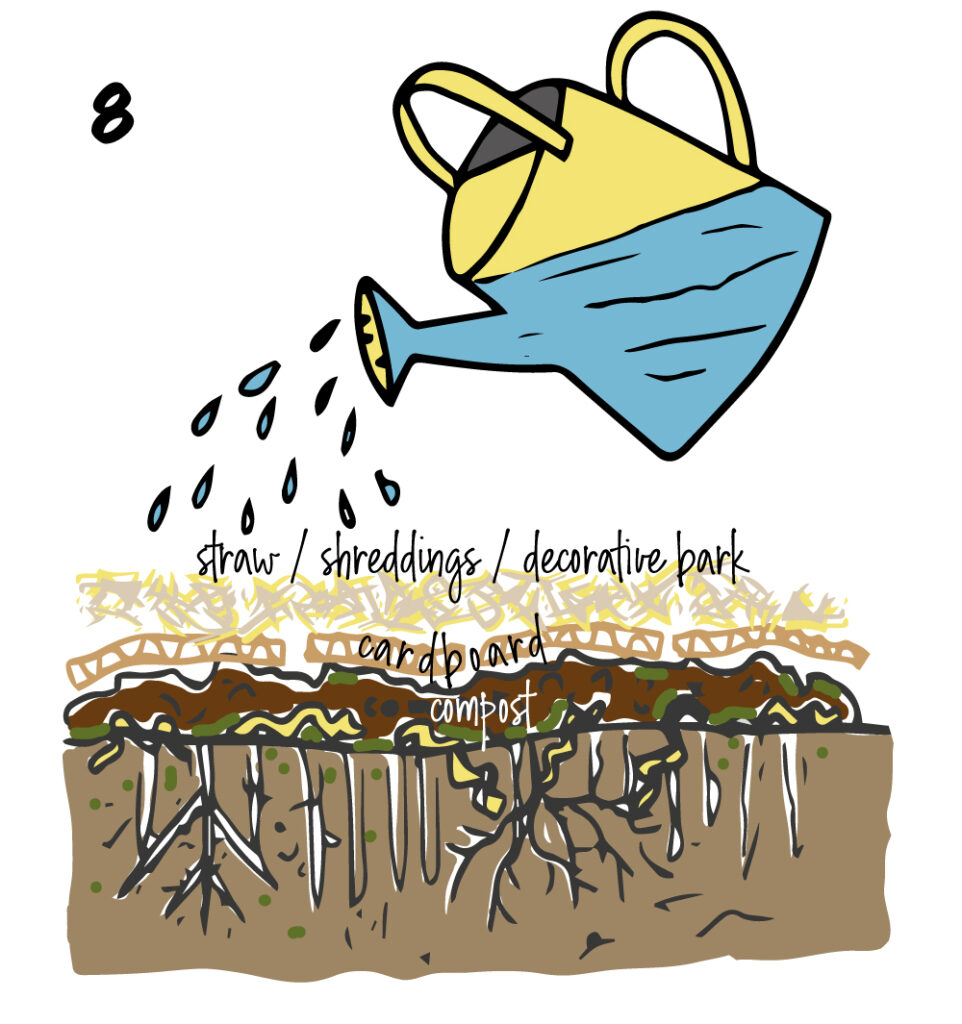
Autumn is a great time to feed the soil in a cold temperate climate. All the layers help to keep the soil warm through the winter and it means that in the spring, the soil is ready for planting. The weeds don’t overtake the garden so you have less work in the warmer months. Any bulbs, like onion or garlic sets, will grow through, pushing aside the pieces of soggy cardboard. In warm climates, it might be a good idea to do this work before the dry season to help the soil hold onto moisture.
If you peep under the cardboard from time to time, you might see earthworms and other creepy crawlies busy at work – millipedes, spiders, woodlouse, beetles earwigs. Remember, other good garden friends aren’t visible (bacteria, protozoa and nematodes) but they are there. You can pick out any slugs for chickens, even though they are part of the micro biome. One of my neighbours has a pond with frogs, and another has chickens. So the slugs and snails provide delicious morsels for these chaps and for the song thrush and black birds.