For Christmas 2022, we didn’t have a Christmas tree. Christmas was dismal in those dark days of December. I have learned that northern winters need cheer to get though them. And a Christmas tree hits the spot. But it can be difficult to choose a tree that does not increase your carbon footprint.
Does one go for a real Christmas tree or an artificial tree. Which tree has the lowest carbon footprint? Which is the least wasteful? Is there an alternative?
I’ve been doing a little bit of research on this matter. I got the most helpful information from The Soil Association. I’ll share.
The Carbon Footprint of Artificial Trees
Artificial trees are mostly made in China. The manufacturers use plastic, polyvinal chloride (PVC), and metal. Then they are shipped across the world.
They use up a lot of resources and fuel. Therefore, a two-metre / six foot artificial tree has a carbon footprint of about 40kg, according to the Carbon Trust. This is ten times more than a real tree that gets burned after Christmas. So to justify the carbon footprint of an artificial tree, you need to re-use it for at least 10 years.
The Carbon Footprint of Real Trees
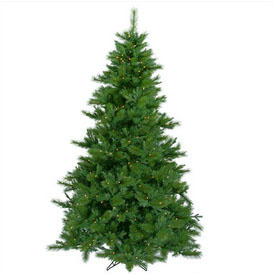
Conifers
Real trees are ordinarily locally produced (in the same country where they are consumed) so they are not transported across the world. Trees, especially from small businesses, are often grown organically, without pesticides, and can be purchased near your home. This means they are a natural resource with natural inputs. Then at a bigger scale, Forest Stewardship Council (FSC) certified trees are managed responsibly with fewer pesticides.
Conifers take 10 to 12 years to grow six foot. While they grow, they capture carbon, filter the air and give wildlife a place to live. When the festive season is over, the all-important thing is to dispose of your tree so that it is shredded for making compost. If you do this, the carbon footprint of your tree will be negligible. You can get advice on responsible disposal of your Christmas tree from Gov.uk.
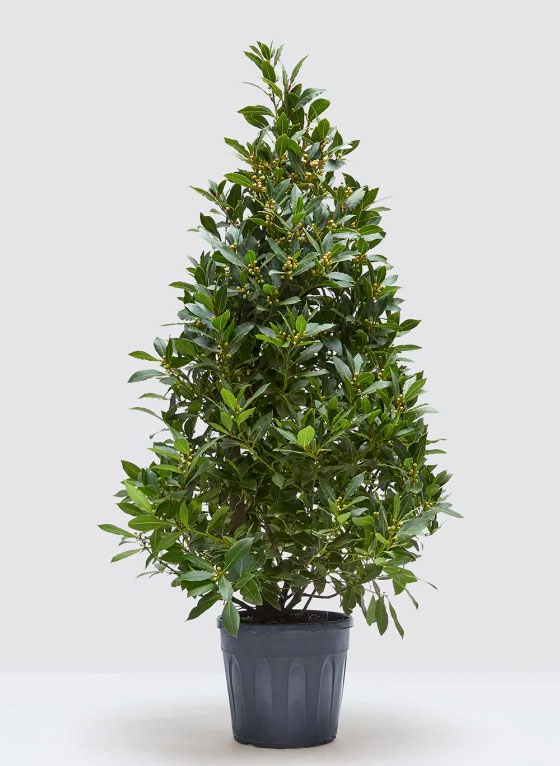
Bayleaf Trees
A bayleaf tree can be a festive centerpiece for the season. They thrive in a pot in the garden. And only need fleece protection when temperatures drop to -5° centigrade. Otherwise, they are hardy.
These days, there are some beautiful decorative bayleaf trees available here in the UK. And they have both aesthetic and culinary value all year around. So you will not need to throw your bayleaf tree away after Christmas. Thus it will go on absorbing carbon all year round and give you oxygen in exchange. As a result, it will reduce your overall carbon footprint.
I trust this information about Christmas trees is useful.
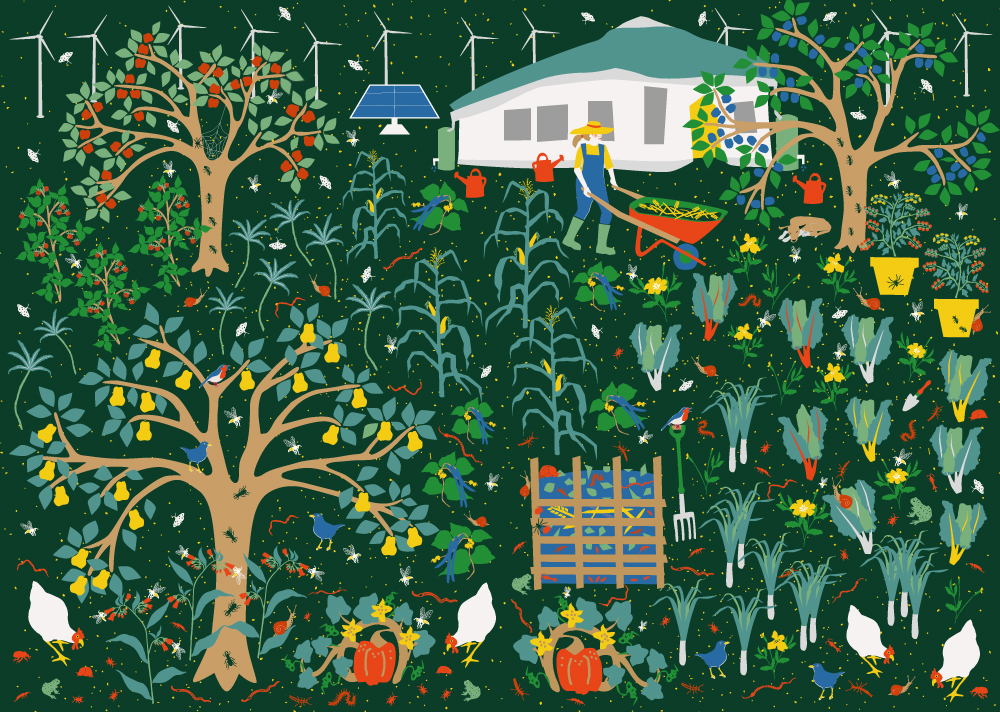
There are a number of reasons to grow food. These are mine:
It makes me feel good. While I am in the garden, all my attention is on what I am doing. It puts me fully in the present, which makes me happy. It is important to be happy.
It keeps me in touch with the foundations of life – the soil and nature, the sun, the rain and the seasons.
In a small way, I reduce my carbon footprint. Firstly, the plants and fruit trees in my garden convert carbon into oxygen. Secondly, by making compost with brown woody and leafy material, carbon is returned to the Earth. Thirdly, by putting food directly onto the table, I reduce my use of carbon emitting transport and farming methods, even if only a little.
As the custodian of my tiny piece of ground, it is fulfilling to nourish the soil and enable microorganisms, plants and other life to thrive. This is part of the notion of being a good ancestor. I am looking after something for the future and creating a gift for my children and grandchildren, through a way of living. I want to be part of a good future narrative.
How I came to grow food
Before I share the way I garden, I want to tell you how I came to grow food.
After World War II, and having lived through the Great Depression, my parents wanted a stable life. Once married, they put their hearts into creating a ‘dream’ farm on which to raise a family. And that meant producing almost all our food.
As children, for a snack, we would pick a carrot out of the ground, or an orange or a mango off a tree. Seasonally, we gathered and feasted on wild field mushrooms, and ate guinea fowl stew. And we slathered fresh homemade bread with our own butter, and drank warm unpasteurised milk at breakfast.
For me, the most important thing I inherited was a love for soil and growing food. This, and crucially a strong connection to the Earth and the forces of nature. That was my parent’s great gift to me.
A circular approach to gardening
When I first moved to England, I had no idea how to grow food in this climate. So I had to start at the beginning. Over the years, I have developed a circular gardening system. Like a circular economy, there is no waste. Almost all of what comes out of my garden goes back in. Some goes to the local garden recycling skip for municipal composting; mainly roots and seedy weedy plants. I use this circular principle to do less work. You could call it being lazy. But it is based on ‘no dig’ gardening.
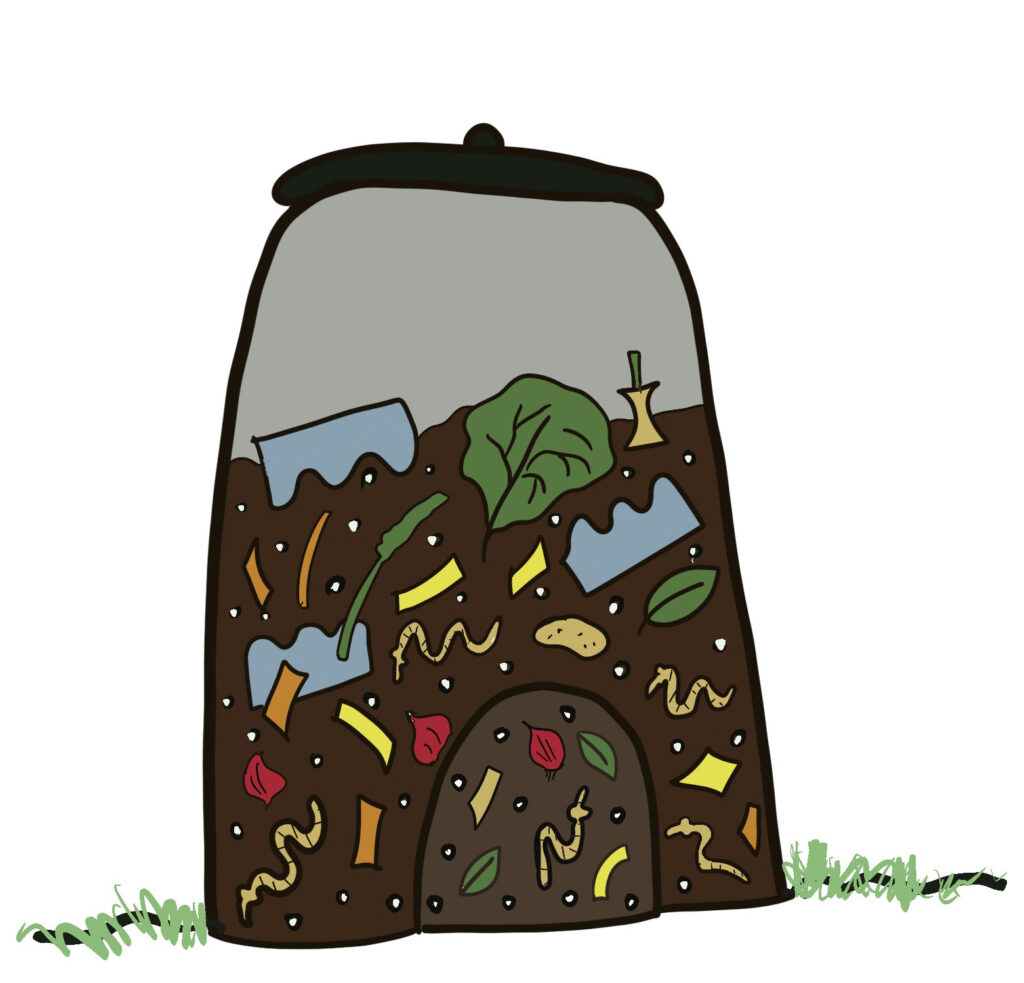
Start with compost
I learnt about compost from my mother. Compost feeds the microorganisms in the soil. Microorganisms are the silent work force that makes nutrients in the soil available to plants. The most familiar one is the humble earthworm. Nourish these creatures and they will do the work of aerating and building fertile, well-structured soil in your garden.
I have five compost systems all going at once. Sounds like work! It’s not.
A kitchen waste converter bin. You can purchase these in garden shops. This is where all our kitchen waste and egg boxes go. This bin is perfect for breeding earthworms. I use the worms when I feed the soil (see below). I regularly turn the contents to keep the bin aerobic. If it gets anaerobic, and slimy, it emits methane. Not good.
2. Chop and drop. When I cut back some plants or throw out cut flowers from the house, I use my secateurs to chop up and drop the material straight into the garden.
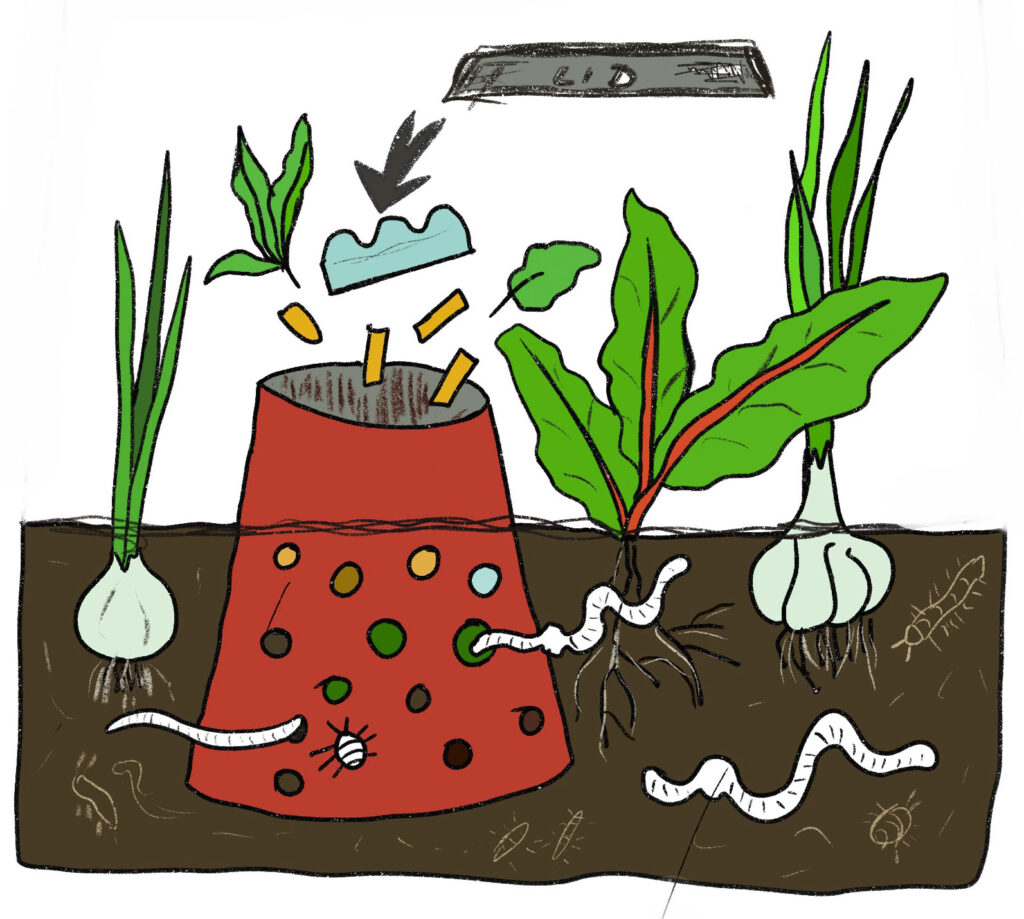
3. Mini kitchen waste converter bins. In the middle of each raised vegie bed, I have a mini kitchen waste converter bin. It’s a bucket in the soil with the bottom cut off, large holes drilled into the sides for earthworms to pass through and a lid (pot plant base) on top. I put a handful of worms from my main bin at the bottom and set the bin away as a breeding ground by feeding the bin with egg boxes and kitchen waste. The earthworms and other organisms then get to work and carry nutrients into the raised bed.
4. A comfrey water butt next to comfrey plants (loved by bumble bees). Standing on some bricks, the water butt has large stones at the bottom and some gravel stones around those. Filled with water, I add and cut comfrey and nettles, throughout the summer. The first batch might take a few months to work its magic. But once its going, you draw liquid manure into watering cans from the tap, dilute it, and use it to feed the soil.
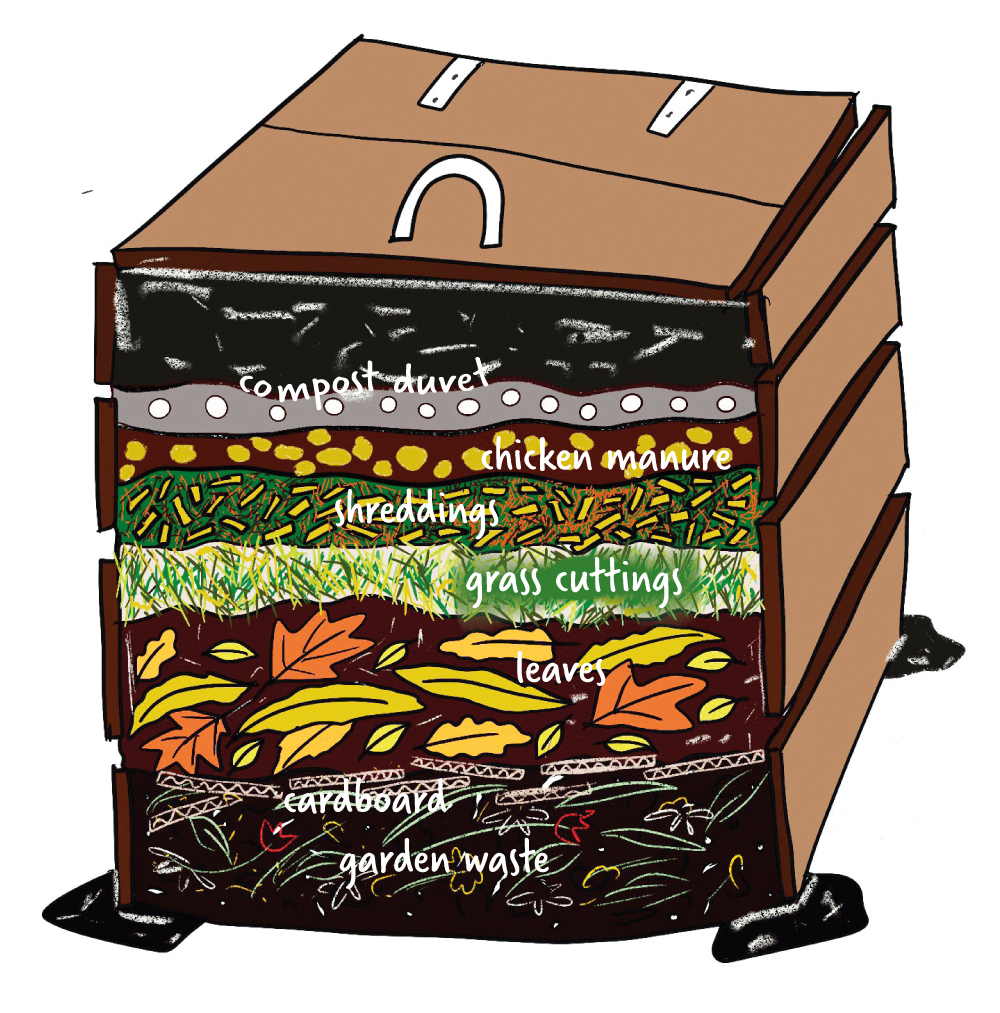
5. A wooden bin for garden waste and chicken manure (acquired from my neighbour’s chicken run). Here I put all the grass cuttings, leaves, shredded rose and fruit tree cuttings (I have a shredding machine), and torn up cardboard. I try to keep a balance between carbon rich brown matter and nitrogen rich green matter. I live near to some woodland, so now and again I grab a handful or two of soil from beneath the trees. This brings micorrhizal fungi into the mix, which is very good for developing soil structure and enabling nutrient uptake by plants.
The box is leaky so it lets in rain and it has a duvet I sewed out of some black garden plastic, filled with bubble wrap saved from parcel deliveries. This cover keeps the compost cosy in the winter. Once in a while I check it its warm and I turn the compost with a fork. This mixes up the elements and keeps the material aerated so that the process remains aerobic.
Feeding the soil in a weed controlling way
The weeds in my garden do get away sometimes, usually, when I am deeply involved in a design project! But I keep them at bay, for the most part, by feeding the soil.
Cut down to their roots any plants that are over. Leave the roots in the soil. This helps develop soil structure and provides nutrients to microorganisms. Chop up the old plants for composting. You can drop them if you like.
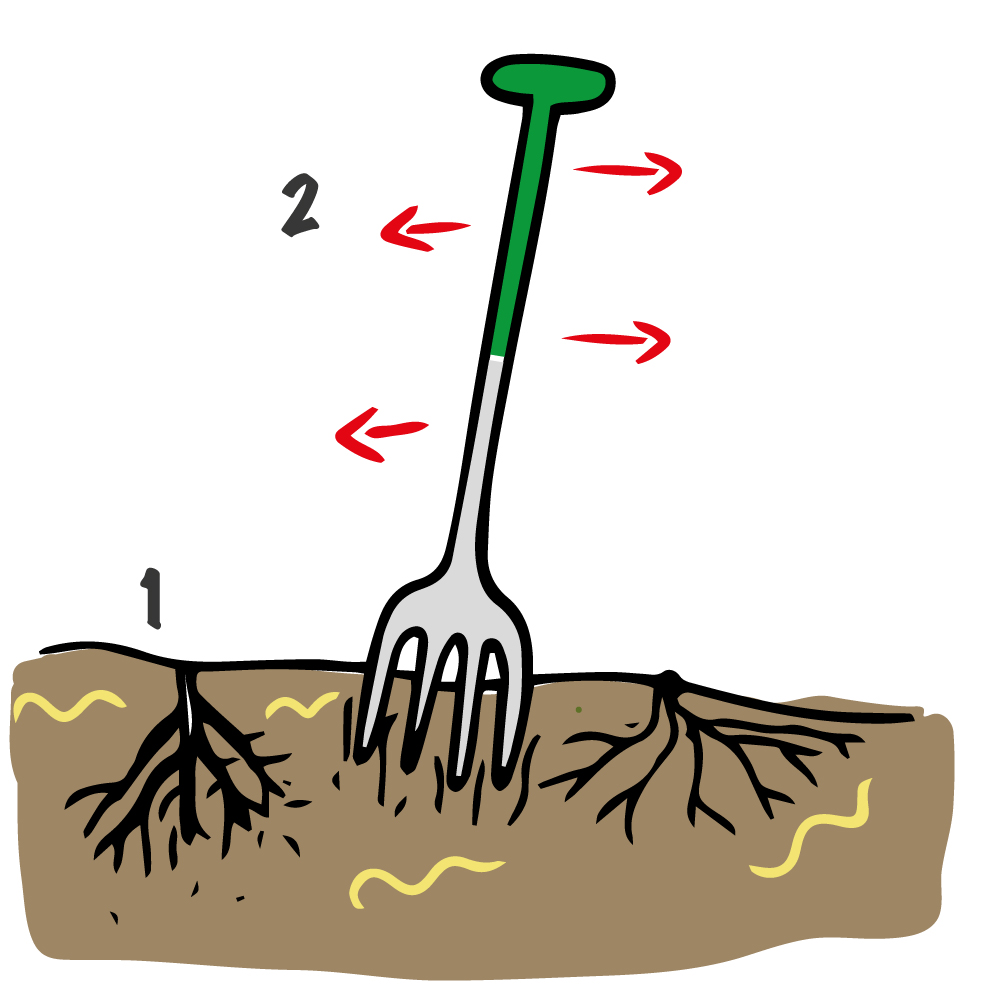
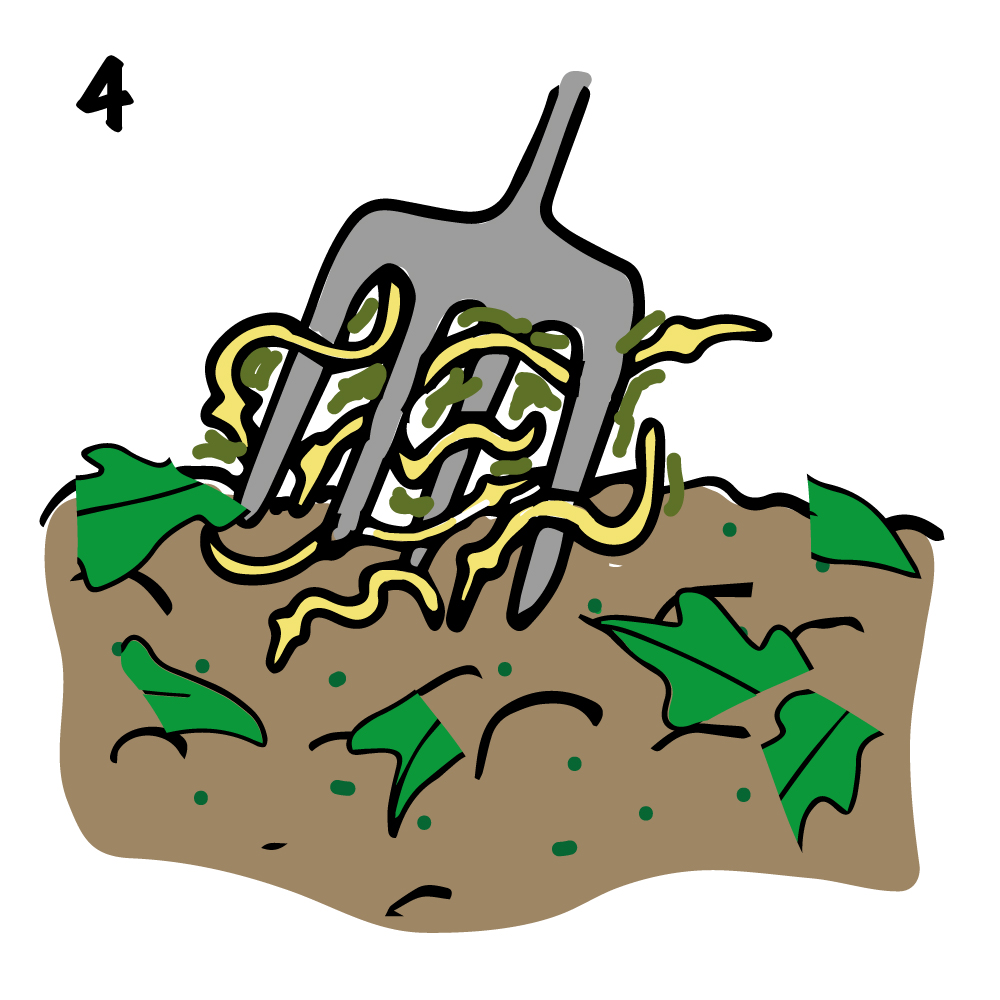
When the ground is clear, begin with a fork. Don’t use a spade, which cuts up earthworms and disturbs the soil structural work being done by your microorganism workforce. Stick the fork into the soil and gently rock it back and forth once or twice to aerate. Don’t over do it. And don’t turn the soil. It’s unnecessary.
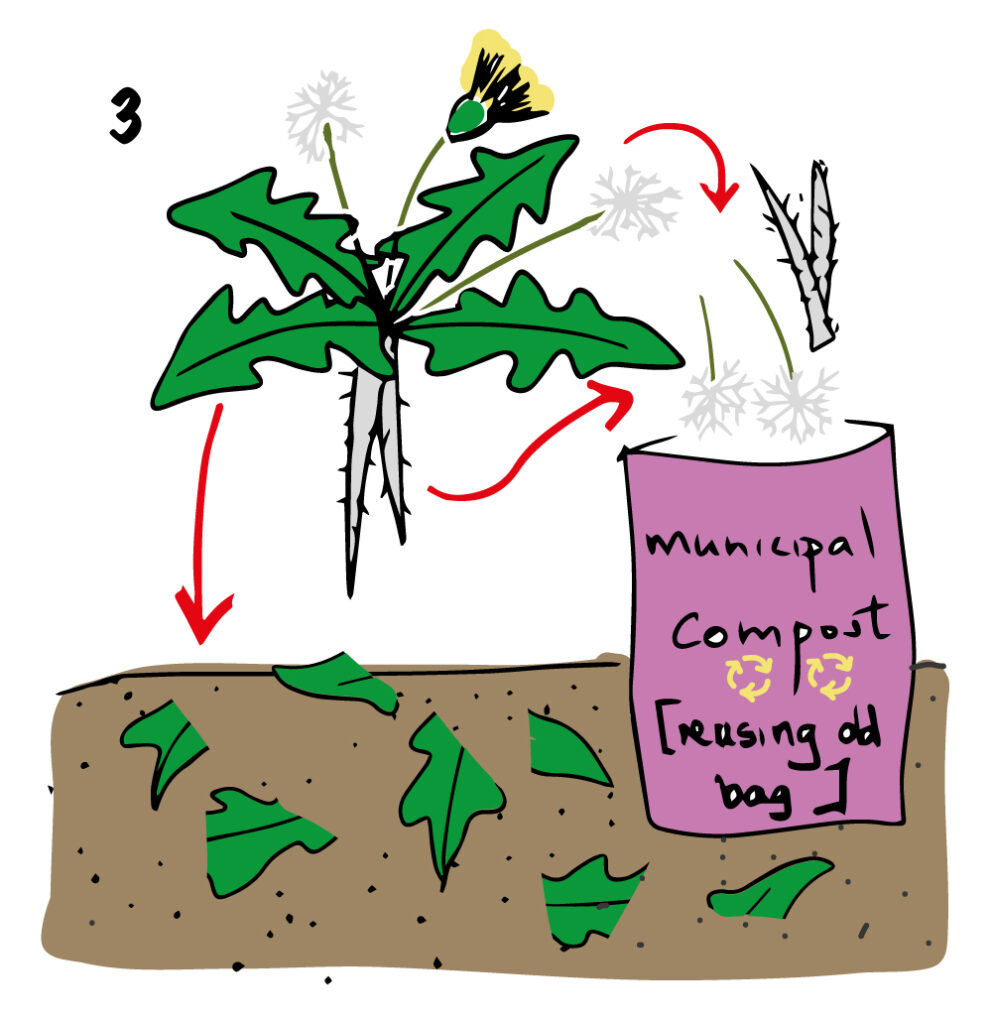
3. Pull out weeds. Remove their flower heads with seeds and their defiant weed root systems (dandelions come to mind). Weed roots and seed heads can go to the municipal compost skip. Then chop and drop the stems and leaves back onto the forked soil.
4. When you have worked an area with the fork, use your fork to carefully lift out some earthworms from the kitchen waste converter bin. This will bring mucky stuff with the worms, full of good bacteria and other soil crawlies. Spread all of this over the soil.
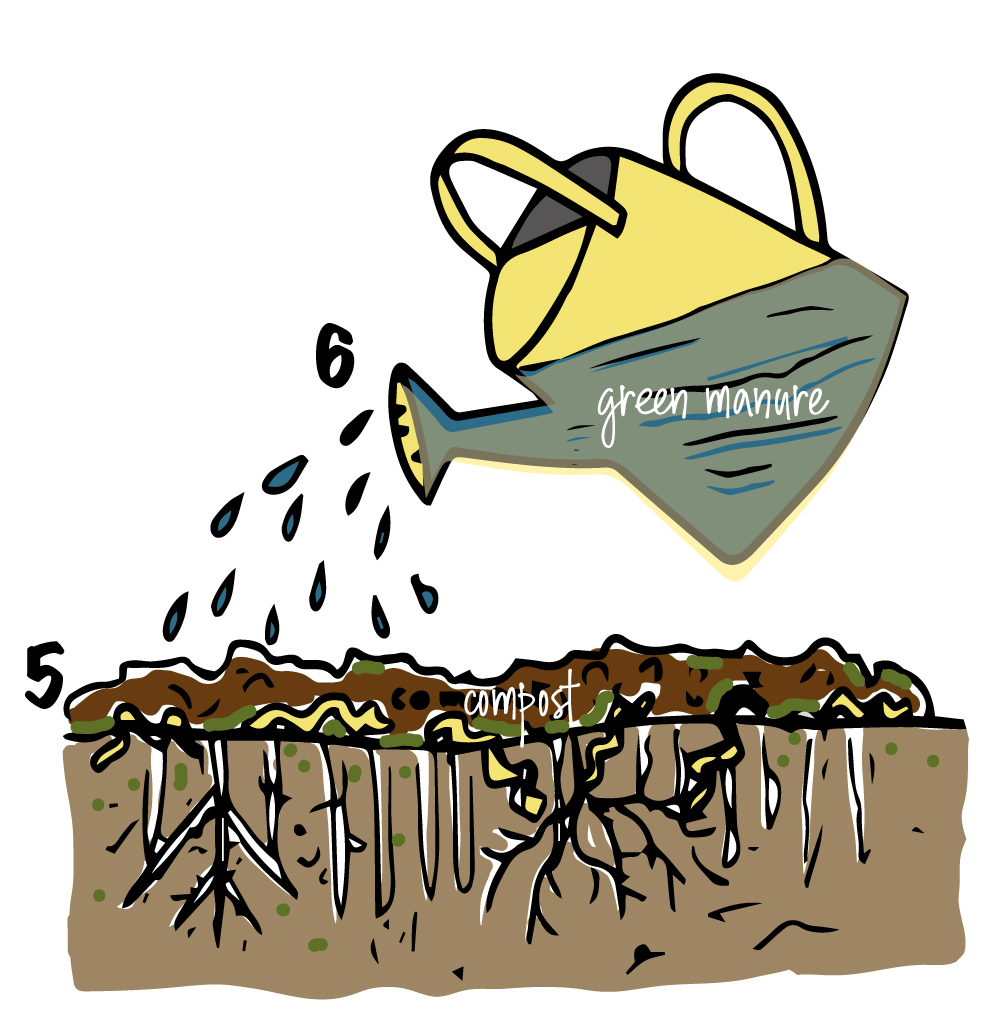
5. Then pour a generous layer of ordinary compost over the scattered worms. Don’t dig it in. Let your micro workers do the work. You can see these micro-organisms in my Living Soil notebook.
6. Half fill a watering can with green comfrey manure, if you have it. It will be a bit smelly, but the pong will soon disappear. Dilute the liquid with water, and sprinkle over the compost.
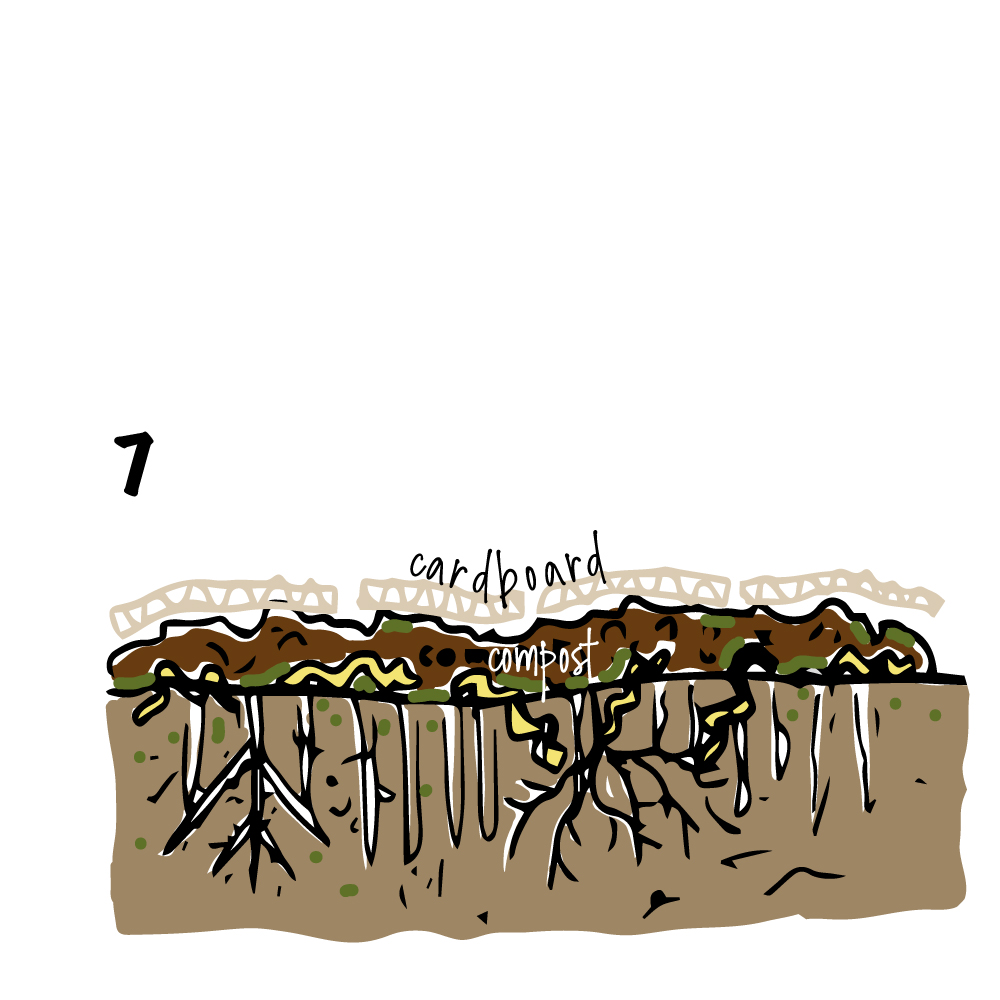
7. Now put on a layer of cardboard. If you tear it up into smallish pieces, like a jigsaw puzzle, over the compost, it is easier to plant later. The cardboard will help keep down the weeds and the micro-organisms will work it into the soil over time. In cold places, it will help to keep the soil warm.
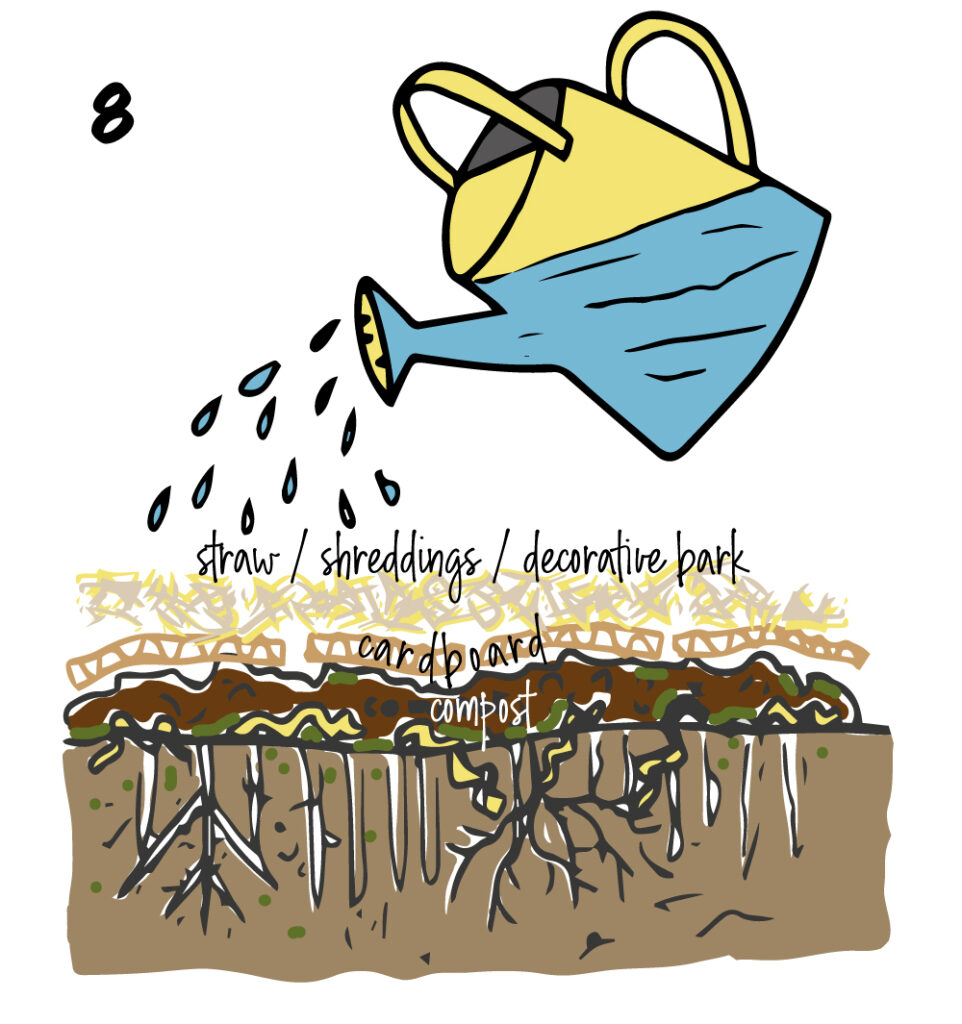
8. Over all the layers, put on a good covering of straw. I buy this in, using a product called ‘Strulch’ (straw mulch). It’s a bit pricy, but a bag goes a long way. You can also use decorative bark or surplus shredded material from the garden. When done, you can water the area to settle all the layers down.
Autumn is a great time to feed the soil in a cold temperate climate. All the layers help to keep the soil warm through the winter and it means that in the spring, the soil is ready for planting. The weeds don’t overtake the garden so you have less work in the warmer months. Any bulbs, like onion or garlic sets, will grow through, pushing aside the pieces of soggy cardboard. In warm climates, it might be a good idea to do this work before the dry season to help the soil hold onto moisture.
If you peep under the cardboard from time to time, you might see earthworms and other creepy crawlies busy at work – millipedes, spiders, woodlouse, beetles earwigs. Remember, other good garden friends aren’t visible (bacteria, protozoa and nematodes) but they are there. You can pick out any slugs for chickens, even though they are part of the micro biome. One of my neighbours has a pond with frogs, and another has chickens. So the slugs and snails provide delicious morsels for these chaps and for the song thrush and black birds.
This story starts in the southern African bush veld, and ends with useful information about using loofah sponges.
An aged sketch of savannah woodland bush veld near our house, which I did in my teens
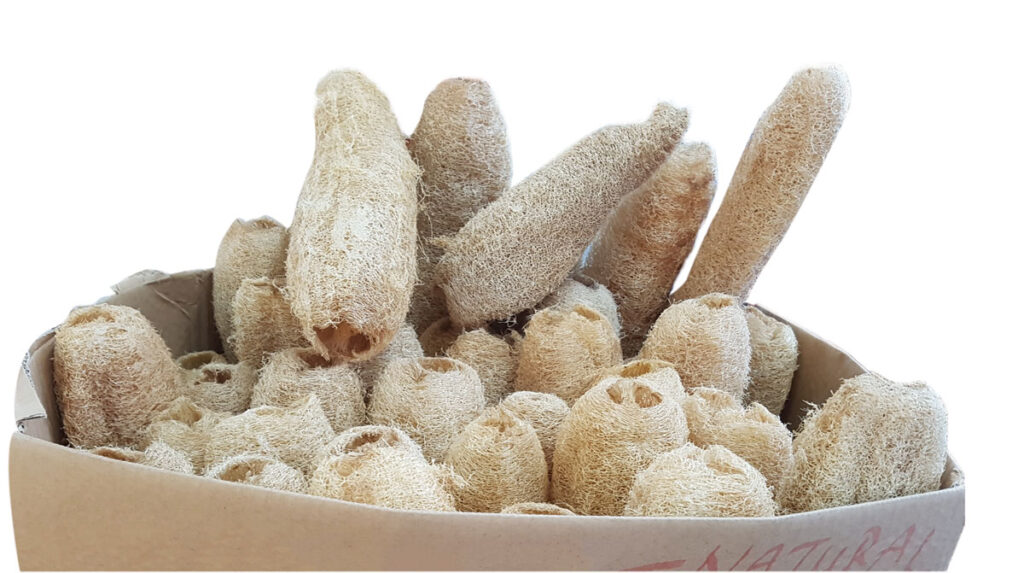
When I was young in the early 1970s we had hundreds of loofah sponges in our house … by mistake. What the heck? Plastic sponges were the next best thing, at the time! Why hundreds?
Box of unbleached loofahs, just like the our loofahs years ago [Creative Commons Attribution: Mokkie; photoshopped by me]
Our Loofah Story
My mother had a market garden, and we took vegetables to town each week. The earnings paid for the petrol to travel the 60 miles and back; and for a few groceries. We mostly lived off the gifts of the farm, so we didn’t need much.
This was not ‘fun’ shopping. Wholesalers and farm supply outlets were our main ports of call. And they were mainly in industrial areas. In the tropical heat, these parts of town smelt of melting tar, diesel, bus fumes, dust and old tyres.
Our first stop, however, was the big vegetable market. In the early morning cool, the large warehouse was filled with the aromas of dewy vegetables, picked at dawn. For me that was the best part of the day. And the Farmer’s Co-op offered midday relief too. We would sit for a pot of tea and buttered anchovy toast, and then buy seconds cheese to take home.
So what about the loofahs?
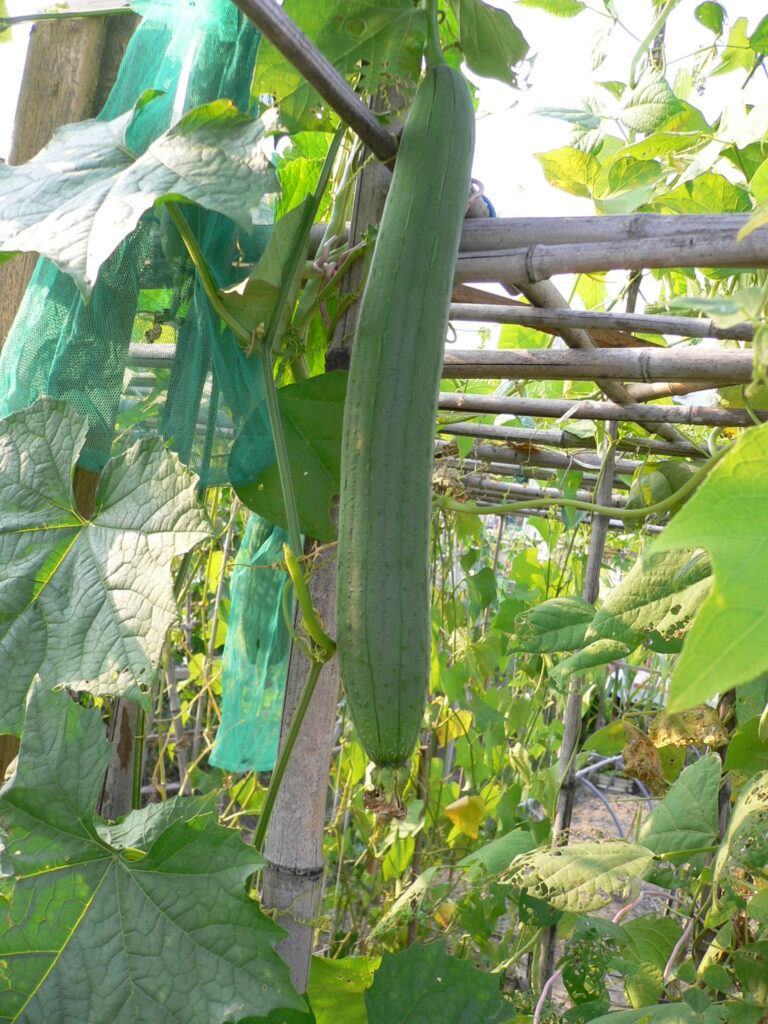
Among the wide variety of seasonal veg we took to the market were cucurbits – things like cucumbers, squash and marrows (courgettes hadn’t happened yet). My mother saved seed, and bought new varieties from time to time. One year, we thought we had a bumper crop of a very extraordinary cucumber. But when we tasted one, it was horribly fibrous and inedible.
A beautiful, cucumber-like loofah [online image: Flickr, Farkomer, May 2009]
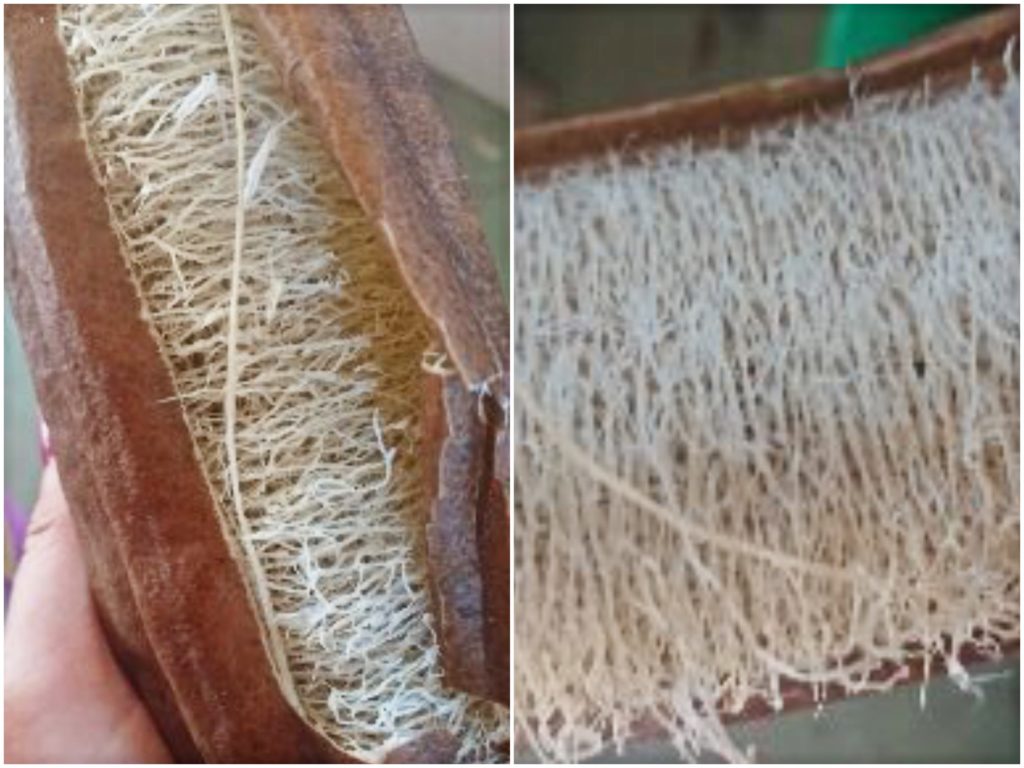
Undefeated, and from our home in the bush veld (no internet in those days), my mother worked out that we had grown loofahs from a seed packet labeled ‘as ‘cucumber’. She then figured out how to process our large crop of loofahs into sponges. The result: we had hundreds of loofah sponges from then on in. We sold some, gave loads away as gifts, and never bought a sponge again. A happy green outcome. No great loss.
To process: let the loofah dry out, pull off the skin and shake out the seeds. [image from BunderbergNow]
Blue Planet 2 and the Global Plastic Shock
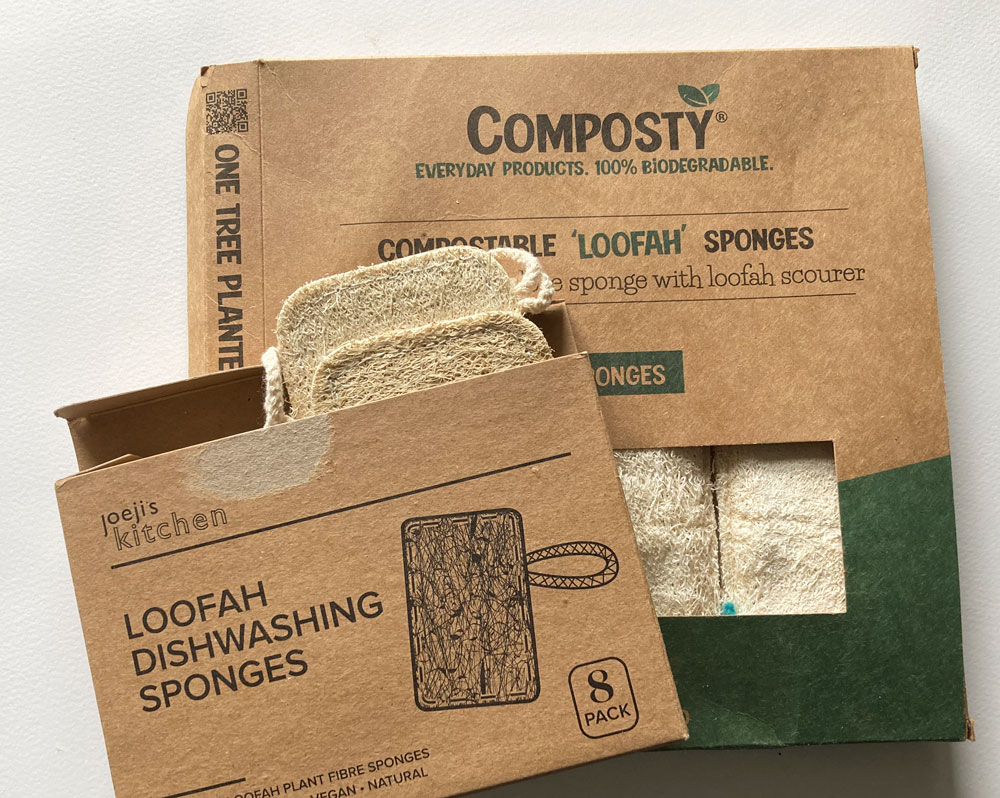
After watching David Attenborough’s final episode of Blue Planet 2, in early 2018, I set about reducing the plastic in our home, here in Northumberland. I googled for loofah sponges and found only one item. I ordered a pack of six sponges. They were shipped from China and took ages to come. And when I opened the parcel, each sponge was individually packaged in plastic within a plastic packet! I’ve used loofahs in the kitchen and bathroom ever since, and they now come in brown recycled compostable card boxes.
Good Things are Happening
Loofah sponges and other natural biodegradable, compostable alternatives are now freely available online and in ‘green’ shops.
Bamboo toothbrushes are appearing in supermarkets as an alternative to plastic toothbrushes
Solid shampoos and conditioners are replacing plastic bottles of liquid agents, not only reducing plastic but also transport volume
Shower gel users are turning back to solid soap
Long lasting galvanized iron buckets and watering cans are reappearing in shops, instead of plastic ones
Wooden and wire storage containers are easy to source again, so we’re not forced to use plastic storage boxes anymore
Plastic straws and cutlery have been banned in many countries
Plastic packaging tape and plastic delivery bags are falling out of use
Plant based, compostable cellophane is now available is available for packaging stationery and artwork.
You can probably think of more. I’m sure there are caveats, and there is still tons of plastic in shops and in the oceans. But awareness is growing, and there is a great turning away from plastic products.
How to Use Loofah Sponges
If you decide to go the loofah route, here are some guidelines from an experienced user.
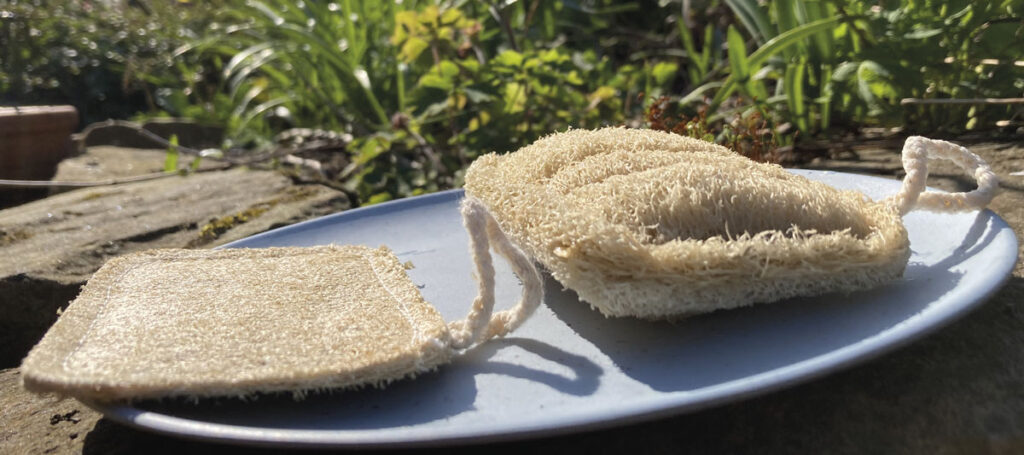
When your loofah sponge is new:
it will feel hard and scratchy
it will swell and soften beautifully when you wet it.
How your new loofah will swell and soften after a few minutes in water
Loofah sponges in the kitchen
Clean your sink and hob with a loofah, using bicarbonate of soda and a spray of vinegar.
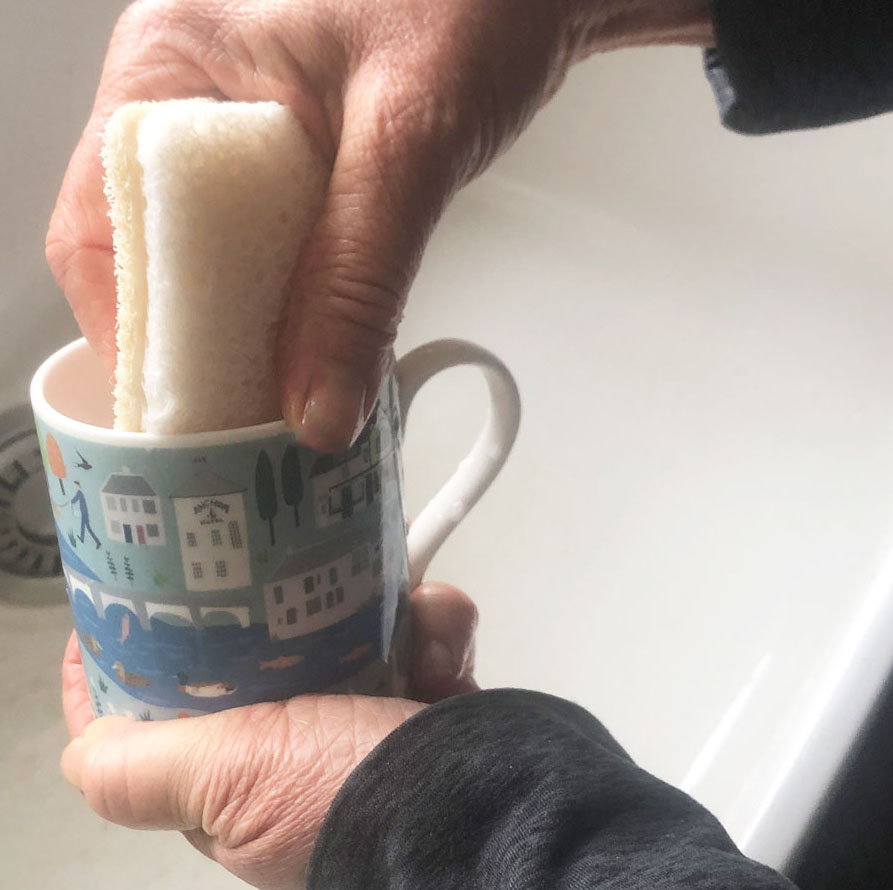
Wash your cups and plates with a loofah sponge.
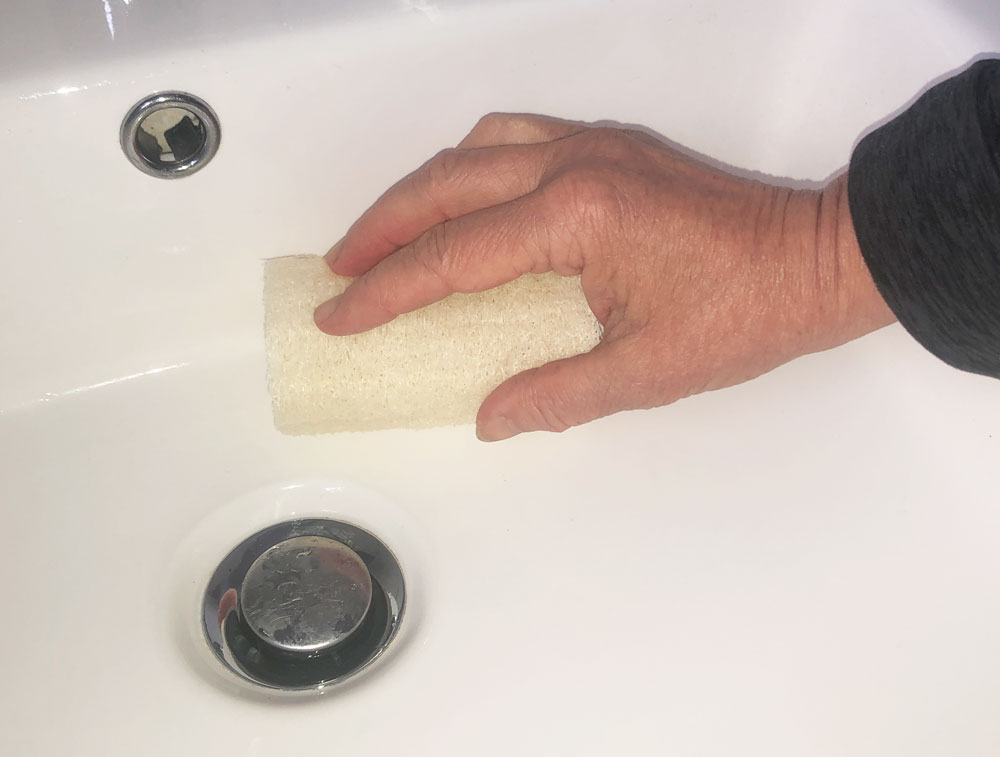
Loofah sponges in the bathroom
Clean your bath, sink and shower with a loofah, again using bicarb and vinegar.
Wash your body with a loofah or a loofah back scrubber (loofahs are now marketed online for exfoliating skin).
Keep your cleaning loofahs separate from body washing loofahs.
Personally I don’t use loofahs for my body. I did when I was young, of course.
Loofah Sponge Maintenance
Rinse and squeeze out the water from your loofah after use. Let it dry out between uses. (This is good practice for any cleaning cloths or sponges because moisture enables bacteria to grow.)
Every now and again, soak your loofah for 5 minutes in a bleach solution of 10 parts water to 1 part bleach, or
Boil your loofah in a pot for 10 minutes, or
Put it in the washing machine with a regular wash.
Saying Goodbye to your Loofah Sponge
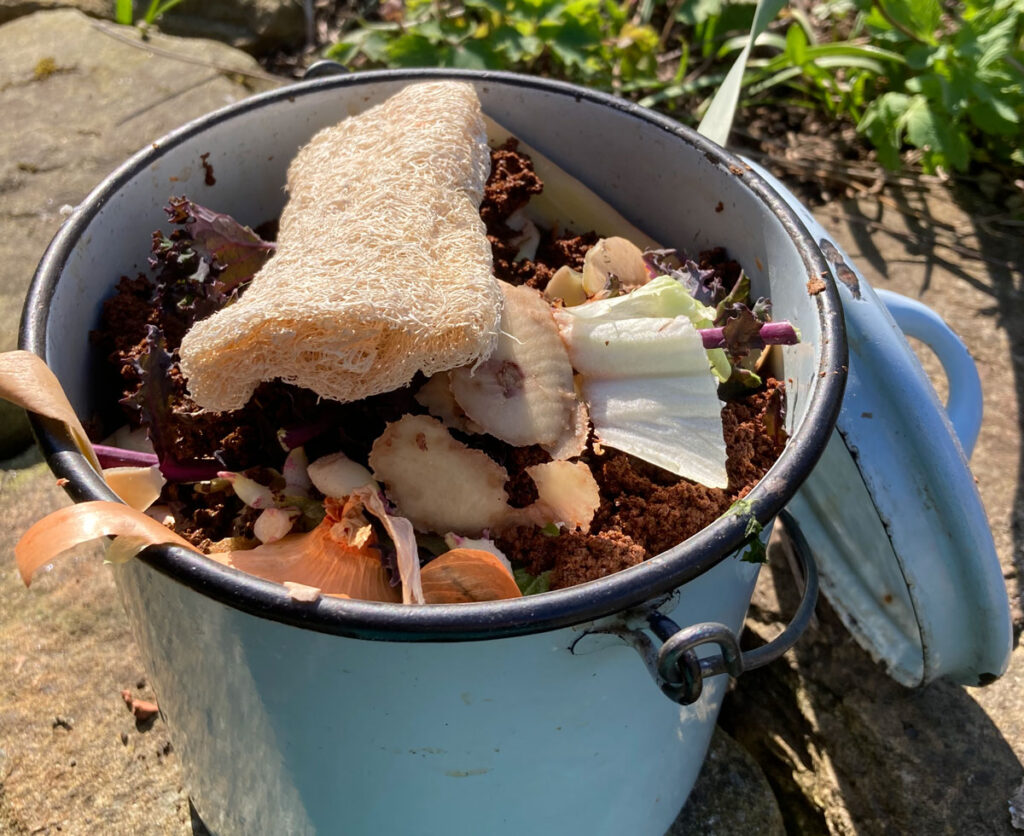
A saggy loofah in my ‘back to nature’ kitchen tin, ready for the compost bin
After some time, your loofah sponge will get tired and worn, just like any other sponge. It will sag, look ragged or even manky. This is when it is time to say goodbye. Thank your loofah for its service and green living credentials. Then put it in your compost. If you don’t do composting, bury it in the ground somewhere. It will decompose, returning to the Earth from whence it came.
Please feel free to comment on this blog. I love hearing your views.


